You may need to record computer activity or gameplay on Windows 10 sometimes. For instance, record your screen and yourself to make a tutorial; record a webinar during a Skype call, record your gameplay victory moments, etc. In fact, it is very simple to capture screen videos on Windows 10. Today I will show you the four best screen recorders for Windows 10 and the step-by-step tutorial. You can compare these utilities and get the best screen recorder on your computer.
4 Best Ways to Record Screen on Windows 10
To help you figure out their differences and pros/cons, we make a comparison table of these four screen recorders for Windows 10 for your reference.
Movavi Screen Recorder
“How to record screen on Windows 10 easily? I tend to use easy-to-operate but professional screen recorder without lag.” Movavi Screen Recorder meets your need. It’s a screen and audio recorder that can record your screen and voice on Windows 10/8/7 in high quality. It is used by many gamers and YouTube video creators to record screens with audio and webcam.
Features of Movavi Screen Recorder
- Record screen capture video in high quality, supporting frame rates up to 60 fps;
- Record computer screen with audio ( system & microphone audio);
- Support webcam to record computer screen and your face at the same time;
- Able to capture mouse clicks while recording;
- Adds annotations during the recording and offer a simple editing tool;
- Schedule a screen recording to start and stop automatically at a specified time;
- Export screen video in MP4, MOV, AVI, GIF, F4V, TS.
- Restore the unsaved or canceled video.
- Record online meetings like Zoom, Hangouts, without permission.
The recorder can not only video record your screen, but also capture screenshots, record audio on Windows 10/8/7. Follow the steps follow to start your screen recording!
Step 1. Download the screen recorder on Windows 10
Click the Download button below to get the 60fps screen recorder on your computer. Movavi supports Windows and Mac computers.
Step 2. Launch Movavi Screen Recorder
Click “Screen Recorder” to record the computer screen.

Tips: If you want to record gameplay without lag, you can click “Game Recorder”.
Step 3. Set up screen recording settings
There are various settings you can adjust to record the screen video that you need.
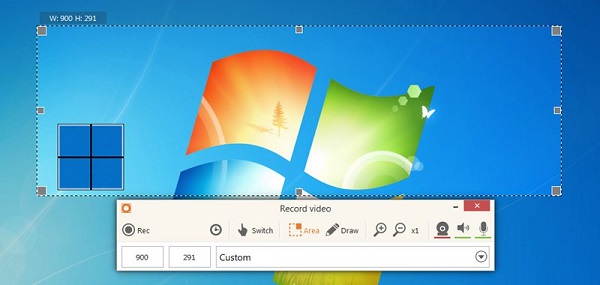
Select recording area. You can choose to record the full screen or a particular area of your screen. For example, you can select Custom and draw an area that you would like to record or select the Fix region to record a window in a specific size (1280 × 720, 854 × 480, etc.). Or choose to allow the recording area to change around or following the mouse.
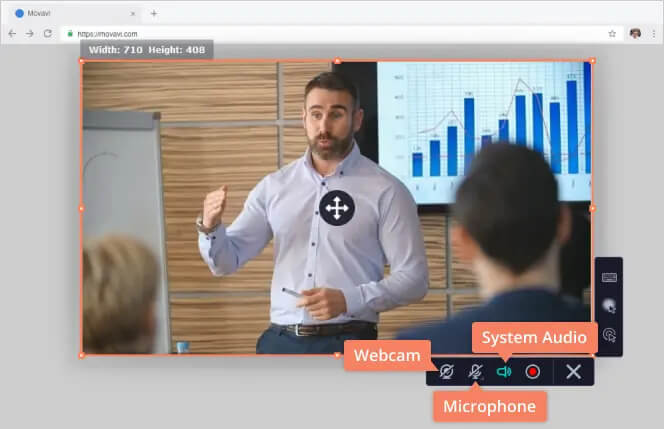
- Enable Webcam. When you need to record your screen and yourself at the same time on Windows 10, turn on Webcam. By clicking Take photo, you can take a photo of what’s on the webcam.
- Enable System Sound. When you need to record audio from your computer, not just through the microphone, toggle on the button for System Sound.
- Microphone. Turn on the Microphone you can also record the screen with your voice from the microphone. Here suggest you enable “Microphone noise cancellation” and Microphone enhancement” to optimize the sound.
- Click Gear Icon, you will find more useful features such as Record mouse clicks, show countdown before recordings, customize hotkeys to record screen, frame rate, the format of the recorded videos.
Step 4. Record Screen on Windows 10
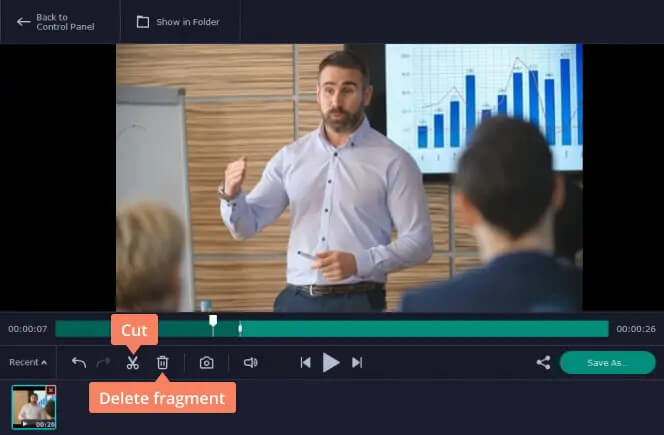
Test the audio with the soundcheck option in Preference. When you are satisfied with all recording settings, you may start recording your screen by clicking the REC button. During the recording, there are annotation tools for you to annotate the screen capture, including adding text, arrow, ellipse, number.
You can also take screenshots and click Timer to schedule a screen recording to stop automatically at a specified time.
Step 5. Save Screen Recording
When you are done recording, click Stop. The recorder will begin to play the recorded screen video. You can view your work and click Save to save the video to your chosen folder on Windows 10.
If you accidentally close the program during the recording, just launch the program again or navigate to the recording history. The unsaved video can be restored in one click.
Xbox Game Bar on Windows 10
Windows 10 has a hidden screen recording tool. It is not a standalone program but a feature of Xbox. Xbox Game Bar is designed to record gameplay on Windows 10, but you can also use it to record screen activities of apps.
Recording screen with Xbox is convenient because you don’t have to install any other app, however, there are some downsides.
- Xbox Game Bar doesn’t record desktop.
- It doesn’t record some programs like Windows File Manager, only works in desktop apps.
- It can record only one app at a time. So when you exit or minimize the app in recording, the recording will end automatically.
- It crashes sometimes when recording gameplay or app in full screen.
- It can not restore the canceled video during the recording.
- And it cannot record webcam, add annotations, customize the recording area as Movavi Screen Recorder does.
Anyway, if you simply want to record gameplay or an app and don’t have other requirements, Xbox Game Bar is quite handy.
Step 1. Click Start and select Xbox from the menu.
Step 2. When Xbox is running, open the app or game you want to record.
Step 3. Click Win + G to activate Game Bar. If it is your first time recording the game or app, Xbox will ask: “Do you want to open Game Bar.” Select Yes, it is a game.

Step 4. Click the Record button or press the Win + Alt + R buttons to start the recording screen. To end the recording, click the same button or simply close the app or game.

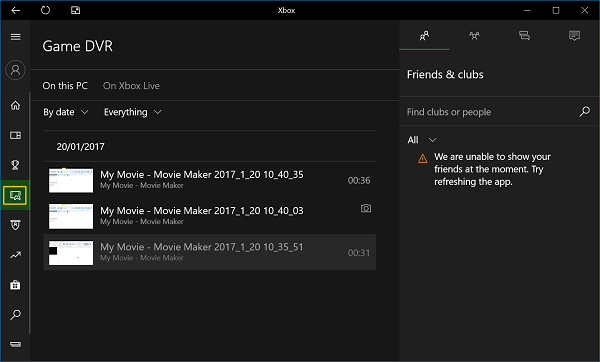
Step 5. The screen capture video will be saved in MP4 to your user videos folder. You can also find the screen videos in Xbox > DVR.
Icecream Screen Recorder
Icecream Screen Recorder is actually a free screen recorder that can be used to record any area of your screen. You can use it to record your games, video tutorials, live streams. The user interface is also user-friendly which is easy to adjust recording. But for some users who have wide requirements on output videos, this screen recorder offers very few formats. So from my point of view, it is preferable to opt for other solutions with more benefits. You need to know only a few screen cropping ratios are available, sometimes software crashes without showing any notification.
OBS Screen Recorder
OBS is a very popular screen recorder that is available on Windows. It’s an open-source screen capturing program that record screen on Windows 10 without watermark and time limit. It can be used for recording different kinds of videos like live streaming, live videos creation, windows capture, and so on. However, OBS is not so user-friendly for new beginners. It’s complicated that you need to figure out elements such as Scene, Source, and so on. Although OBS is a 60fps screen recorder but tends to be laggy when running on low-end PCs.

Verdict
Which is the best screen recorder for Windows 10? The answers depend on what you need. If you only need a 60fps screen recorder to record gameplay to show off your achievements, Movavi Screen Recorder may suit you. Or record screen to explain something to a friend and doesn’t want to install an extra app, then Xbox is a good fit for you. Make your own choice!
Tip: If you tend to record screens on computers or devices with some apps, like LICEcap or DU Recorder, you can compare them first and I think Movavi Screen Recorder will be the best alternative.
How useful was this post?
Click on a star to rate it!
Average rating / 5. Vote count: