Do you find that everything is changing quietly? If you want to be competent for your job, you need to keep learning and communicating widely. New knowledge can hardly be acquired by reading at home. However, too many meetings and too much business travel are unbearable, and they are also stealing your time from learning other things that are new. Accordingly, to fit this busy modern age, many companies are promoting using a remote video conference instead of the traditional one, freeing most employees from spending time in getting back to the companies and having the meetings.
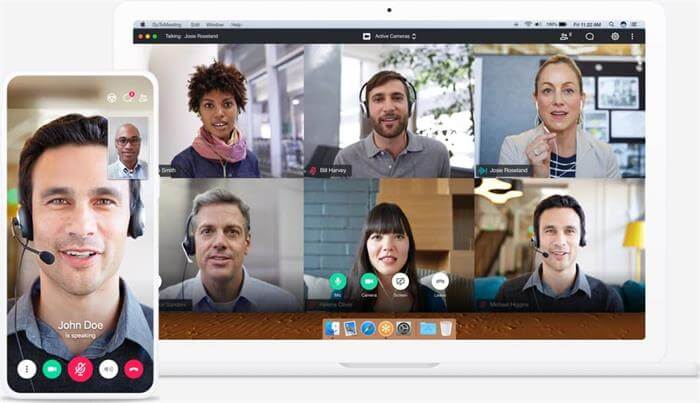
Now, no matter where you are, as long as you have a computer or mobile phone, you can participate in a convenient and efficient professional meeting. This is the new professional conference form that is being popularized in the technology – Webinar, released on the GotoMeeting platform.
Although GotoMeeting is efficient for you to attend the meetings at any time and anywhere, sometimes there is too much information you need to markdown. When you can’t remember so many details, you can try to record the online meetings down for not to miss too much. Now, this blog takes you through how to record GoToMeeting sessions on PC conveniently.
Part 1. Record GoToMeeting Video and Audio with Its Own Screen Recorder
GotoMeeting session realizes efficiency plays an important role in remote office integration, which can improve the communication efficiency within enterprises and control the communication cost. To help people record the video meeting held on GotoMeeting session so that important details of the meetings would not be missed, users can use its built-in screen-recording function directly. Before using its recording function, you need to complete the setup process before the meeting start.
PREREQUISITES:
- GotoMeeting Recording requires taking up at least 500 MB of free disk space. Before recording, you must ensure that there should be more than 1 GB of free space.
- By default, the recording will be saved under the My Documents folder. If you need to change the location of the recorded video file, set it in advance.
- Turn off private software or those that might disturb you, and the recording function will record all the activities displayed on the screen during its proceeding period.
After completing the above preparatory work, you can learn how to get started recording the GotoMetting session with our guide below!
GUIDE:
STEP 1. Open GotoMeeting and select the users you want to include in Cloud Recording in “User Settings”. Then click the “Cloud Recording” in the function menu.
STEP 2. From the options, click “Cloud Recording” and press “Save”.
STEP 3. When you start the meeting, press the “Record” button.
STEP 4. After the meeting, you can find the recording video in the “Meeting History” for playing back.
The biggest advantage of using the recording video function of GotoMeeting is its simplicity. At the same time, there are still some small regrettable shortcomings.
SHORTCOMINGS:
- At least Windows Media Player 9 should be available for Windows users to record GoToMeeting directly;
- Requires at least 500MB of hard disk space to proceed to record the meetings;
- The recording will stop automatically if hard disk space drops down to 100MB;
- Converting a recorded session to Windows format requires 1GB or twice the size.
If you don’t want GoToMeeting’s shortcomings to cause any errors during you are having the meeting, we need to consider other more specialized screen recording software to help to record GoToMeeting sessions. Next, I want to recommend a more professional video recording software that works more reliable.
Part 2. Advanced Method to Record GoToMeeting Session on Windows/Mac
Movavi Screen Recorder is a professional screen capturing tool for Windows/Mac. With Movavi Screen Recorder, you can easily capture the real-time GotoMeeting session on Windows or Mac, output the recording to a convenient format, and share recorded meetings with colleagues.
FEATURES:
- Support recording all operations and activities on the desktop;
- Support real-time editing of the video recording;
- Hotkeys can be used to control the capture more conveniently;
- Provide different output formats of outputting the recorded files, including WMV, MP4, MOV, F4V, AVI, TS;
- Work on both Windows and Mac;
- Enable you to capture snapshots of a particular screen while recording;
- Allow you to customize the recording size according to your need.
Download Movavi Screen Recorder for Windows or Mac. We recommend you start with the free trial version for first-time usage. Next, let’s have a look at how to operate Movavi Screen Recorder in use.
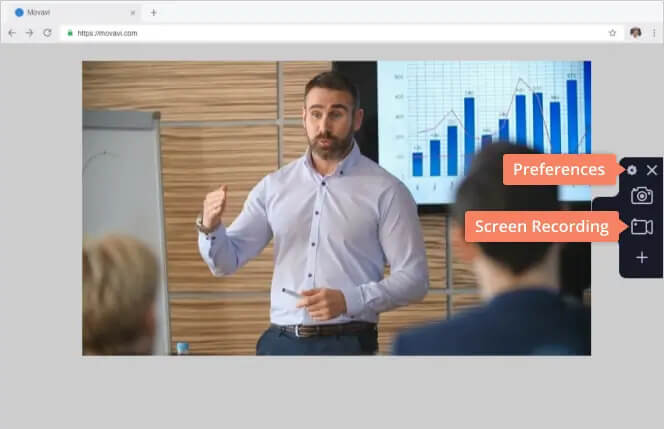
STEP 1. Launch Movavi Screen Recorder
Launch the program and you will see this simple interface. Then choose Video Recorder for preparing for recording the GotoMeeting session.
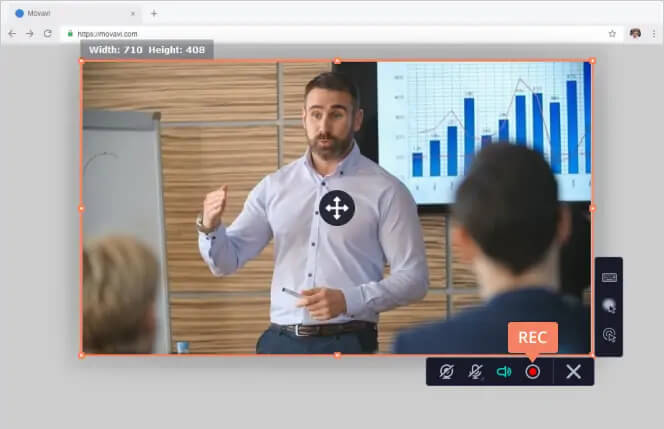
STEP 2. Customize the Capturing Area
When you select Video Recorder, you can choose “Full screen” to record the entire screen, or select “Custom” to crop out a screen area to fit the size of the GotoMeeting session. Then you can also turn on “System sound” as well as “Microphone” to record both your and your colleagues’ voices down.
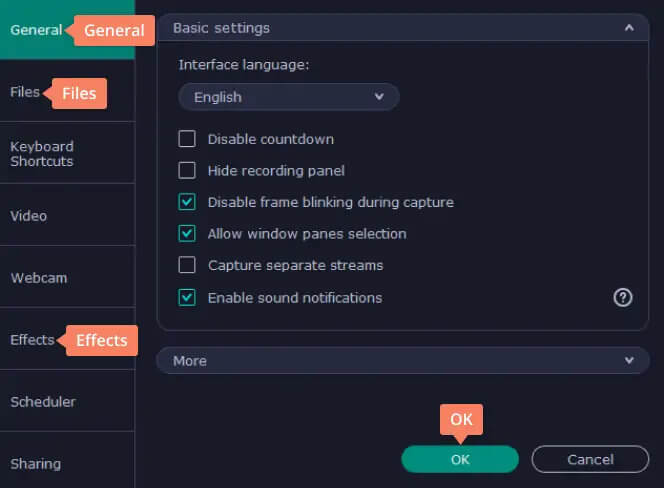
STEP 3. Customize Settings
Click on the gear icon above the “Microphone” section, you can do more preference settings with the “Preference” menu – here you’ll find options for helping you to use the program more conveniently.
Preferences
STEP 4. Click REC to Record
Are you ready to start recording the meeting? Just click the “REC” button. During the recording, the camera icon allows you to take a screenshot of the screen if you need it.
Note: When you start recording GoToMeeting, you can edit the video instantly using the drawing panel.
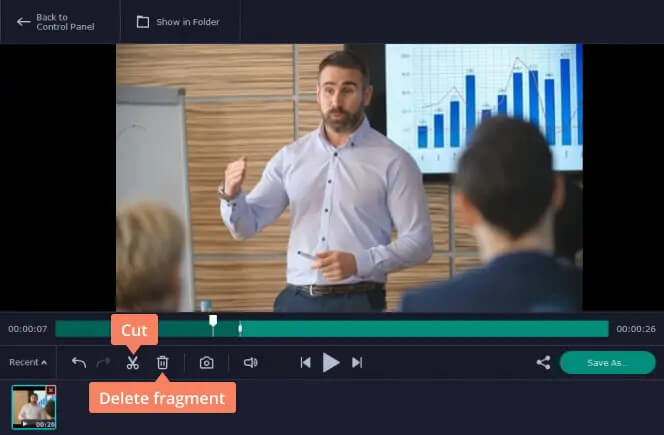
STEP 5. Save the Recording
When Movavi Screen Recorder finishes the recording, you can click on the REC button on the bar to end the recording. Then, click on the “Save” button to save the recorded GoToMeeting session.
More and more enterprises are trying to prompt remote communication and real-time interaction by using GotoMeeting. Using Movavi Screen Recorder, you can mark down all the important points mentioned in an online meeting, so that you can make sure you have not forgotten some key details put forward by your boss. If you find Movavi Screen Recorder helpful, help us spread it to the world! Thank you for your support!
How useful was this post?
Click on a star to rate it!
Average rating / 5. Vote count: