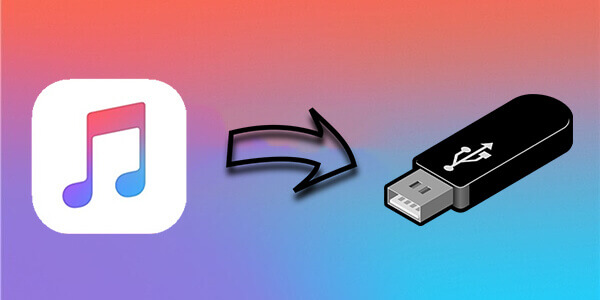
How do I copy Apple Music songs to usb drive? Have you thought about this too? You might think, That’s easy, I can transfer any file I want to a USB stick, why can’t I do it with an Apple Music song? Well, to inform you, there are limitations to this. It’s not as easy as a direct file copy operation. Sure, you’ll be able to copy the file, but will you be able to play it?
We’ll introduce ways to accomplish this seemingly simple task. An important thing to note is that a third-party tool app is needed for this. Apple has put restrictions on its songs, and so it’s probably the only way to get through. We’ll also explain why Apple chose to do this and dig deeper into the technology they’ve used.
You’ll also be able to copy Apple Music to a USB for free, but of course, this will only be limited to personal and backup copies. The rest of the article explains the process further.
Part 1. Can You Copy Songs from Apple Music?
Apple Music has built-in DRM, and it’s important to remove DRM from Apple Music to be able to copy Apple Music songs to a USB drive.
What is DRM? DRM stands for Digital Rights Management. It was developed during the early days to protect copyrighted content. With the onset of music streaming services, DRM has gotten more complicated, and more tech has been crammed into it. Even Spotify, Tidal, and Amazon Music have embraced this tech. It’s also a process used by Apple, but they’ve also incorporated their technology called FairPlay in it.
FairPlay is a technique wherein passkeys are encoded on a track in a music file. These passkeys are generated about a user’s name and password. While these keys are encrypted to secure their songs from illegal access by other users, they’ve also incorporated cloud security by syncing this with their Apple servers. That’s why you’ll have to authorize your device first with an internet connection before you can play Apple Music.
Audio conversion is also an attractive process when dealing with copying songs from Apple Music. When you do this, you’ll be able to play the songs with other media players that play a different file format. You can choose a format based on audio quality, including playing with its settings. Bit rate, Bit resolution, sampling rate, number of channels, and audio container all play an important role in determining the audio conversion process.
With this complicated process, we’ll introduce a third-party tool app that can help you copy Apple Music songs to a USB drive. This may involve several steps, but we’ll guide you through this. Please continue reading the rest of the article.
Part 2. The Easiest Way to Copy Apple Music Songs to a USB Drive
Tool to Remove DRM from Apple Music
Here we’ll introduce the Apple Music Converter. Apple Music Converter is an all-in-one audio conversion and DRM removal tool. As time evolved, Apple Music Converter has seen that audio conversion is not the only process required to meet the needs of audio enthusiasts. DRM removal also became an integral part as every song from music streaming services has one already. An important step to copy Apple Music songs to a USB drive is to remove DRM from it so that you can play the songs later with any media player.
Apple Music Converter not only operates on music but also on podcasts and audiobooks. Its library is tightly integrated with iTunes. You’ll also notice that it works with iTunes in parallel (iTunes in the background). This is to ensure that it does the recordings correctly, without fail, and without any copyright infringement or modification.
You can run Apple Music Converter initially in a Trial mode for 30 days. This is completely free. When you decide to purchase it, get a license key either from the TuneseFun website or the startup screen of the app.
How to Copy and Transfer Apple Music Songs to a USB Drive?
Step 1. Download and install the Apple Music Converter. PC and Mac versions are available below:
Step 2. Open Apple Music Converter. You’ll be greeted with the trial version (with a limited 3-minute conversion time for songs). You also have the option of purchasing a license key to unlock the 3-minute cap.
Step 3. Now go to the Library. You’ll see that TuneFun is in sync with your iTunes ( Apple Music) library already to make file navigation easier for you.
Step 4. You can change categories from the left pane. Switch to Music, Podcasts, Audiobooks, or Playlists just like in Apple Music or iTunes.
Step 5. Choose your songs with a checkmark. Batch conversion is also possible.

Step 6. You can optionally change the output settings below. By default, the output format is MP3.

Step 7. You can change the output directory to a directory on your USB drive for quicker outputs. Optionally, you can drag these files later to a destination drive instead.
Step 8. Once you finish your song selection, click Convert.
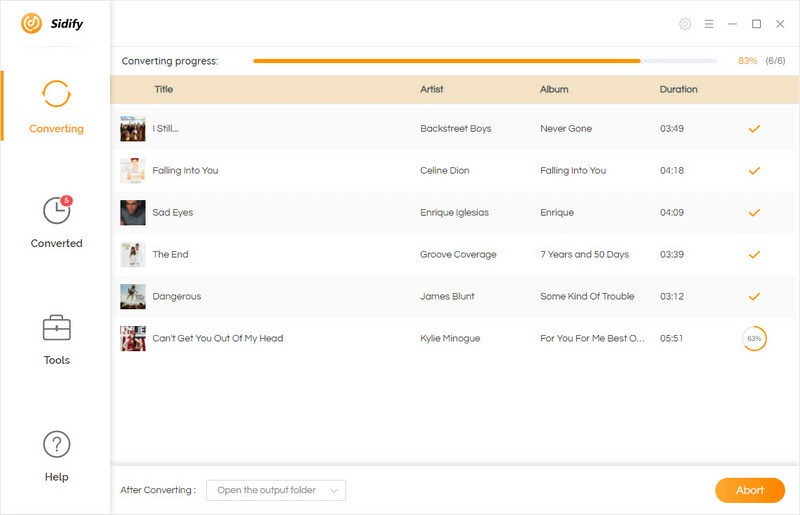
Step 9. When finished, go to the Finished tab. You can drag these files to your USB disk in case it is not yet saved there.
That’s it! You’ve just copied Apple Music songs to a USB drive! It’s that easy!
Conclusion
We presented ways to copy Apple Music songs to a USB drive. The process involves DRM removal and some audio conversion. We used a popular third-party tool app, which is the Apple Music Converter, for this. We hope this how-to has helped you with your audio conversion needs.
How useful was this post?
Click on a star to rate it!
Average rating / 5. Vote count: